


You web application is ready to be released but, where will you host it?
By using AWS S3 buckets as your hosting and AWS CloudFront as your content delivery network your website will be ready to handle large amounts of traffic.
In this tutorial, we will discuss how to implement a scalable hosting solution and distribution for your web application.
You need an AWS account. If you don't already have one, follow this easy video tutorial.
Table of content
- What is AWS S3 ?
- Setup AWS S3 Bucket
- Enabling website hosting in AWS S3 Bucket
- What is AWS CloudFront ?
- Setup AWS Cloudfront Distribution
- Conclusion
What is AWS S3? 🤔

Amazon S3 stores data as objects within buckets. An object consists of a file and optionally any metadata that describes that file.
To store an object in Amazon S3, you upload the file you want to store to a bucket.
When you upload a file, you can set permissions on the object as well as any metadata
Features:
- Encryption to the data that you store
- Multiple copies are maintained to enable regeneration of data in case of data corruption
- It regularly verifies the integrity of data stored using checksums e.g. if S3 detects there is any corruption in data, it is immediately repaired with the help of replicated data.
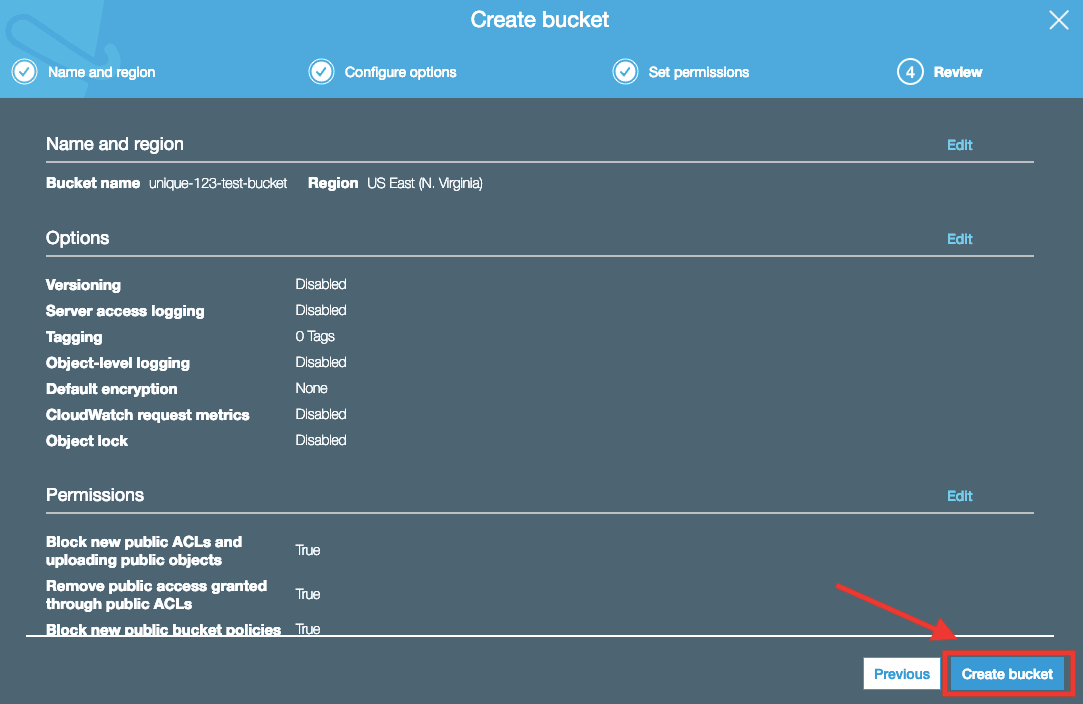
Creating a bucket
- Go to S3 service in the AWS Console and select Create Bucket
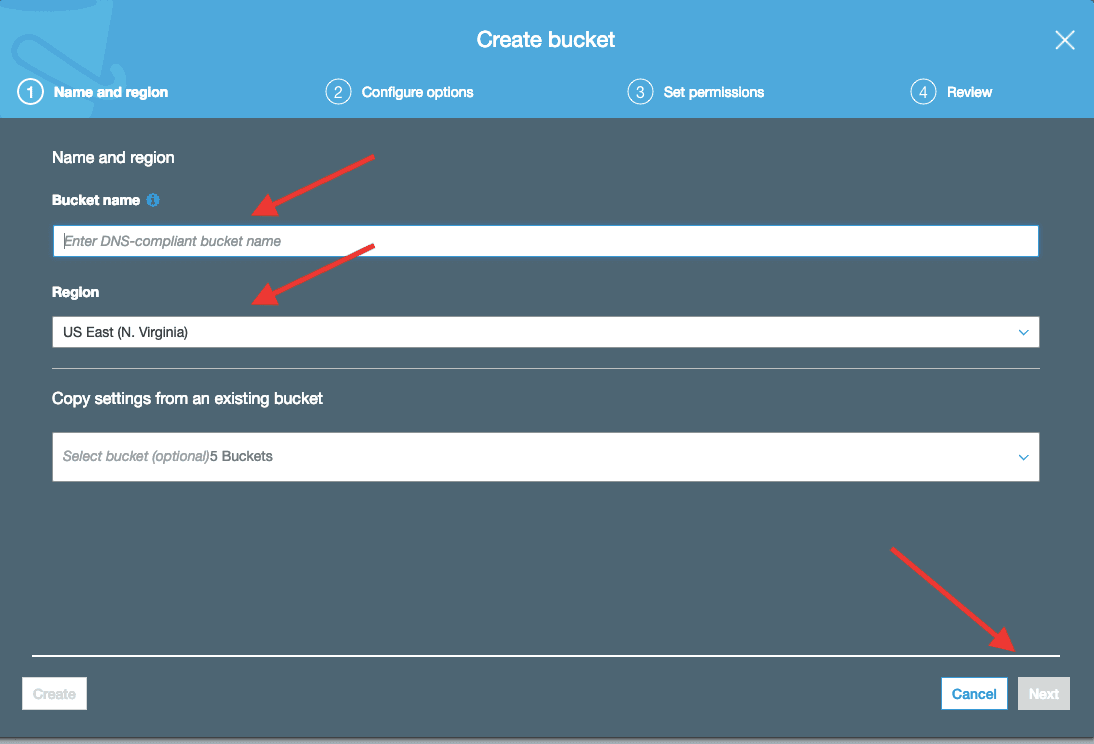
In the Bucket name field, type a unique "DNS-compliant" name for your new bucket
For Region, choose US East (N. Virginia) as the region where you want the bucket to reside.
- Now go and upload your site to the S3 Bucket.
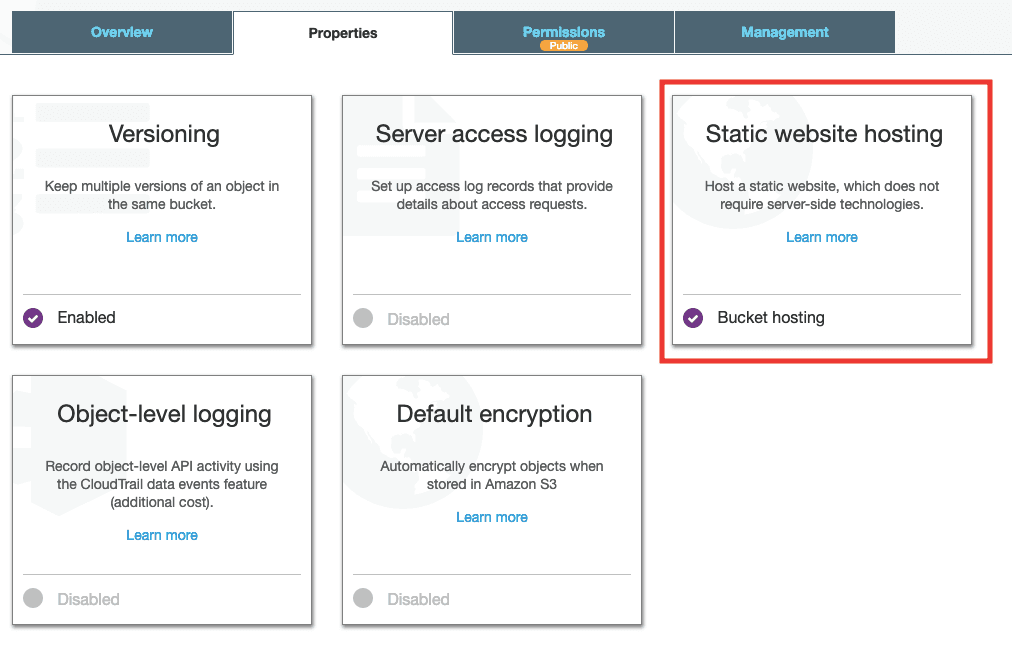
Configure your S3 bucket to be a static website hosting
- Go to your bucket properties and look for the "Static Website Hosting" option
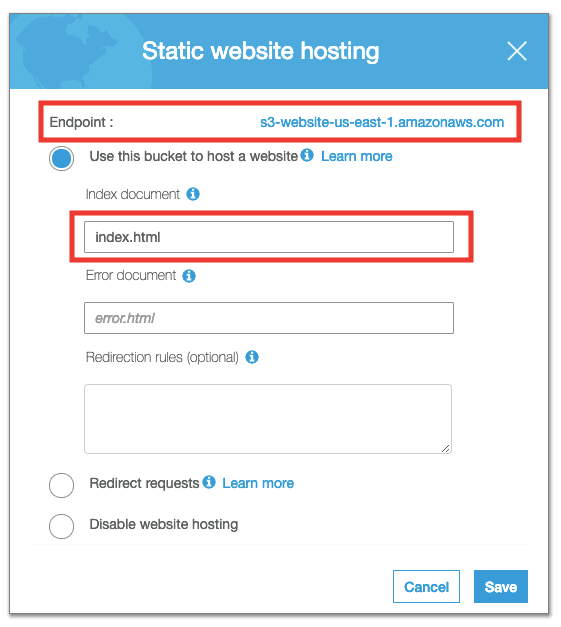
- Select the "entry point" file for your website.
If you are serving a react or angular single page application (SPA), this will be the index.html
- Write down the endpoint URL.
This is your website URL now.
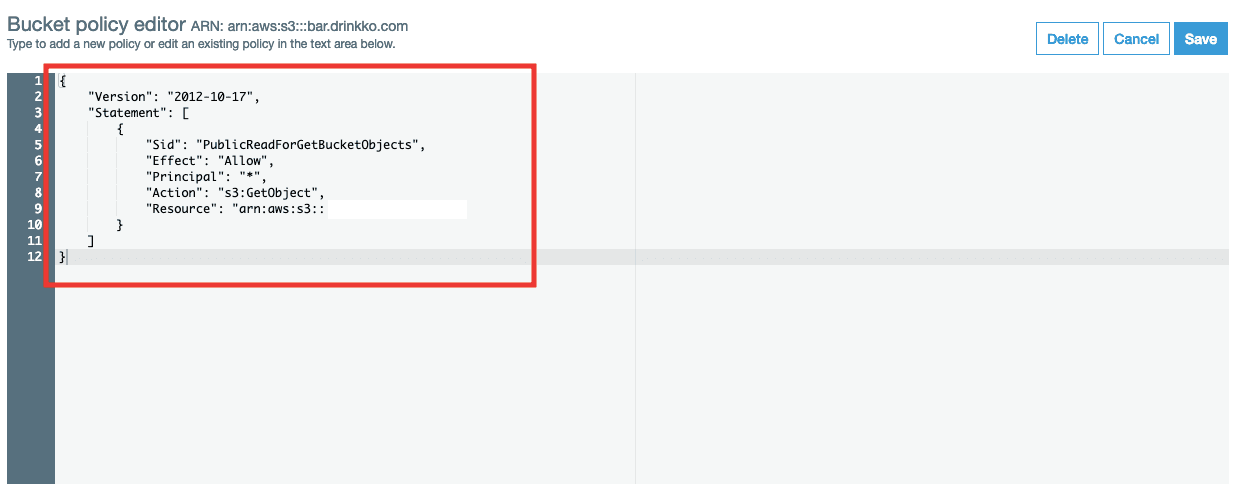
- Make sure your Bucket Policy is Public
Go to the S3 Bucket Policy section and check that your configuration is correct.
Congratulations!
Now you have your site running in AWS S3.
But, we can do it better.
Let's improve our page loading time with AWS Cloudfront
AWS CloudFront 🧙

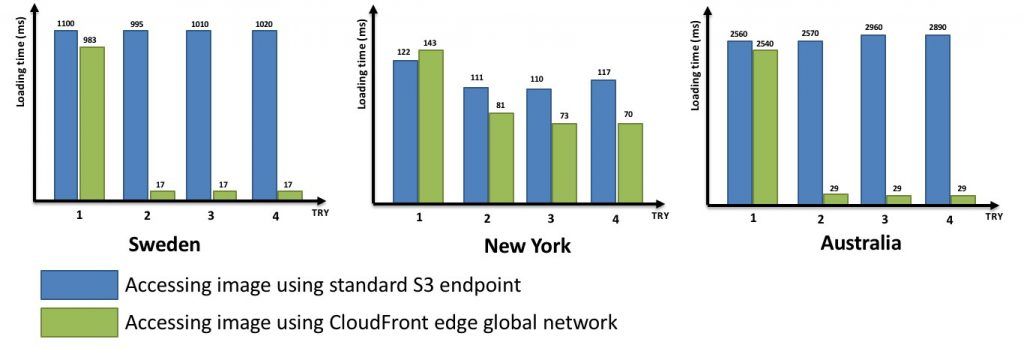
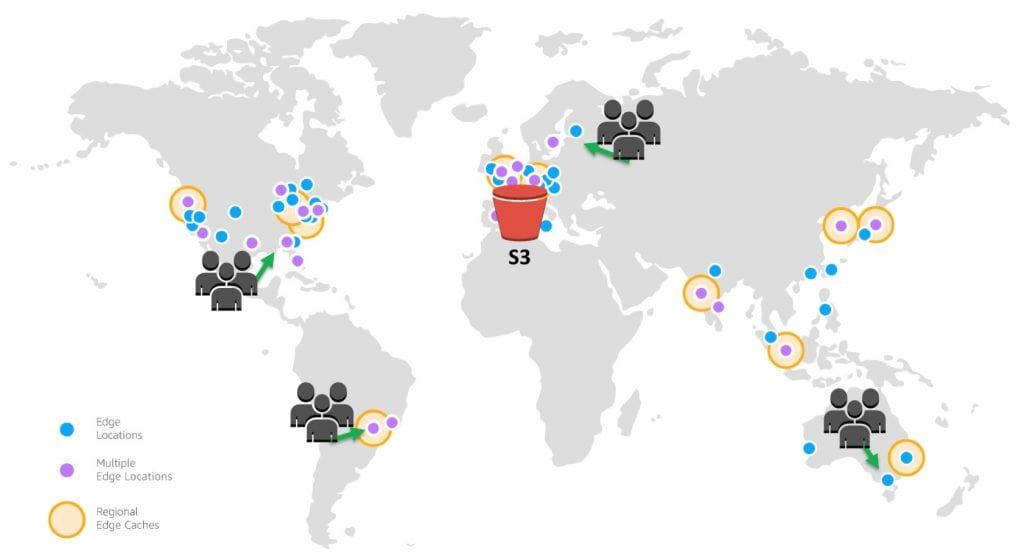
AWS CloudFront speeds up the distribution of your web content (HTML, CSS, js, image, video, etc) to your users.
It delivers your content through a worldwide network of data centers called edge locations.
When a user requests content that you're serving with AWS CloudFront, the user is routed to the edge location that provides the lowest latency, so that content is delivered with the best possible performance.
Features:
- Protection against Network and Application Layer Attacks
- SSL/TLS Encryptions and HTTPS
- Increase application availability
- Free data Transfer between AWS cloud services and Amazon CloudFront
The idea is to use CloudFront as a proxy to our AWS S3 bucket

Creating a CloudFront Distribution
Let's go back to the AWS Console.
- Navigate to AWS CloudFront service

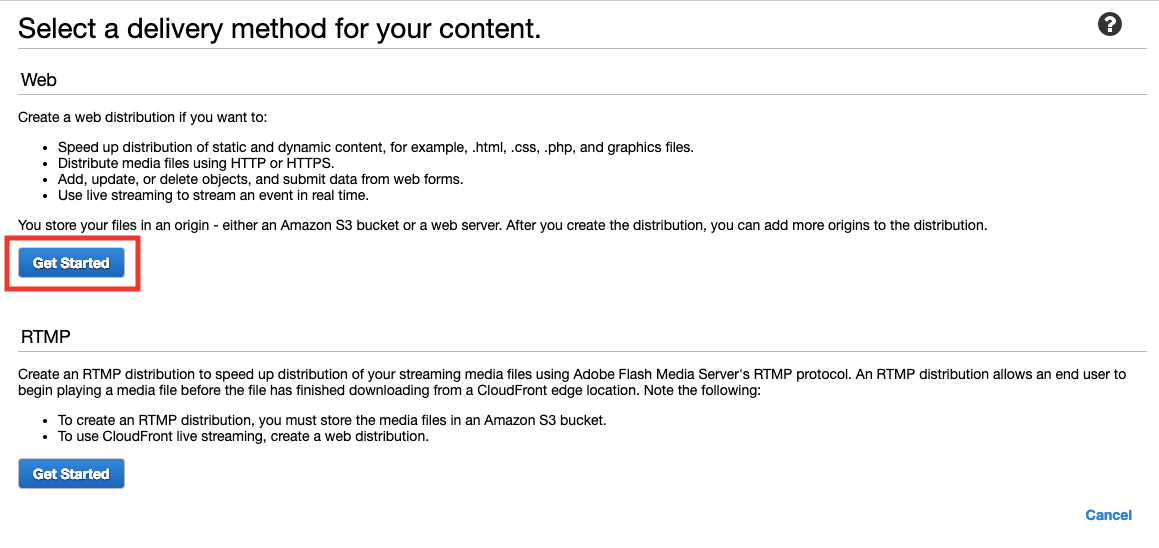
- Select Create distribution

- Select Web distribution
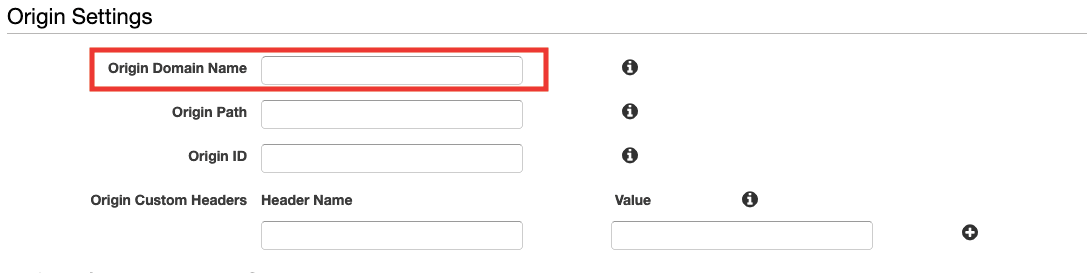
- Configure Origins
Origins are places where the distribution should look for content, in our case is the AWS S3 Bucket for our website that we created in the previous part.
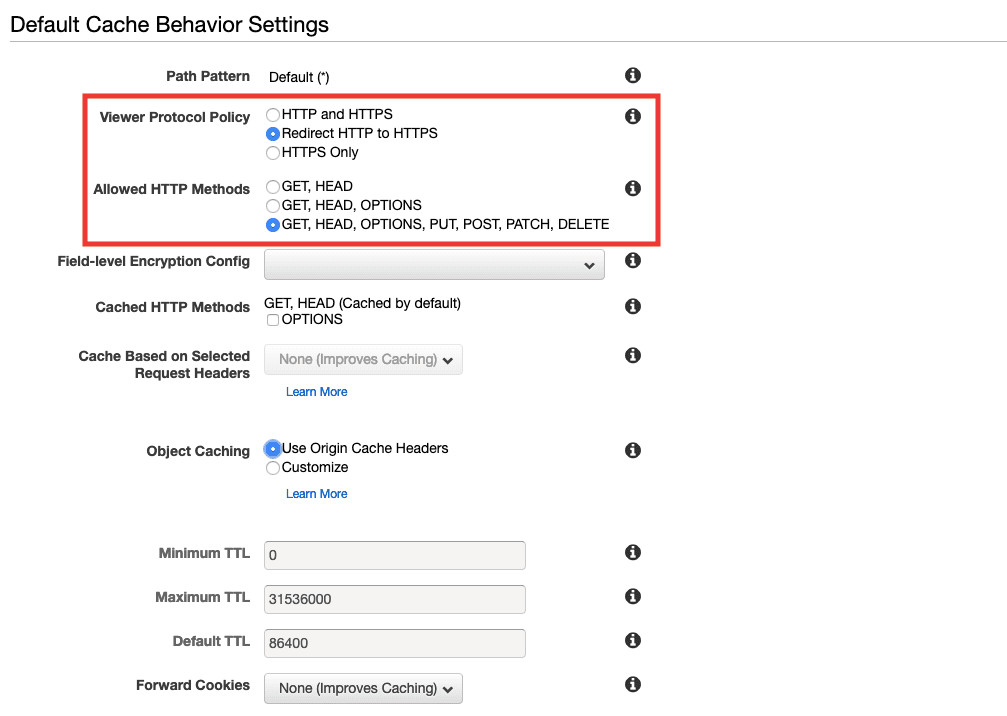
- Configure Cache Behaviours
We want to redirect all HTTP request to HTTPS, after all HTTP sites will not be accepted anymore on chrome.
Also, we want to allow all HTTP methods.
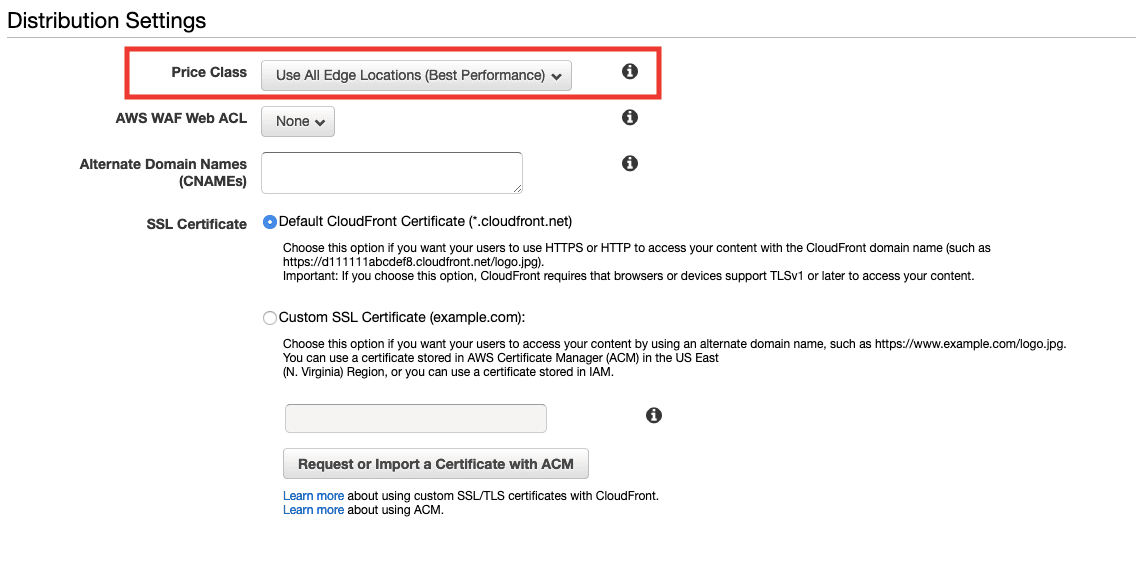
- Select price class
We are going to use all edge locations, I have clients in South America and Asia, so better go with all from the start.
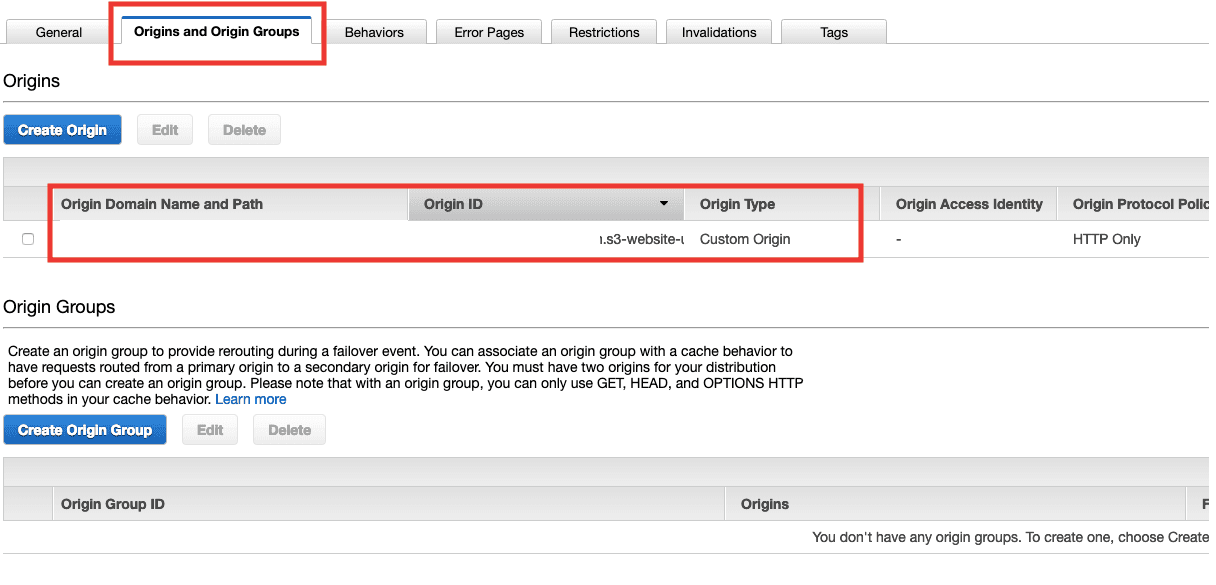
- Just to make sure our origins are well configured, go to Origins tab and check the configurations.
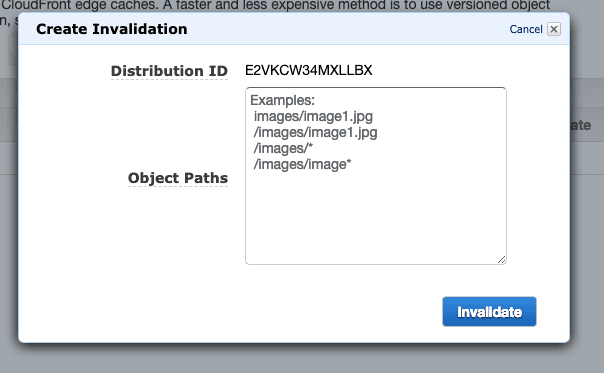
- Invalidation Cache after each deploy
This is very important, every time you push a new version of your website, you have to come here and create a Cache Invalidation.
If you forget, your users will see the old version of your website until the cache is refreshed.
Read how to do this automatically

For this, I usually just set * which means invalidate all routes and resources.
But you can go specific and prevent from invalidating some assets cache, like images and video.
Result
Now you have your site ready under this CloudFront distribution URL.
You will want to create a DNS Alias pointing your domain to it.
Conclusion 🎉
With the combination of these two fantastic services, we can develop a scalable hosting and distribution solution our web application.
We learn how by using AWS S3 we can storage or host our web application, and by using AWS CloudFront CDN we can handle a large amount of traffic without slowing down the page load speed.
The costs of using this scalable infrastructure can vary depending on your traffic but for small sites should be almost free.


